How to Insert Pages with Different Orientation in Microsoft Word
Many students struggle when creating a Microsoft Word document that needs both portrait and landscape pages. This is one of the most common formatting problems in academic work, especially when a report, module, project paper, or research output includes a wide table, a chart, or a figure that cannot fit well in portrait layout. The usual mistake is simple: students change the orientation without understanding that Word applies this change to a whole section, not just to one page. Microsoft’s Word guidance and user support discussions consistently point to section breaks as the correct way to handle this formatting need.
The good news is that the solution is not difficult once students understand the logic behind it. If you want only one page—or just a few pages—to appear in landscape while the rest remain portrait, you must separate the document into sections first. After that, you can change the orientation of the chosen section without affecting the entire file. This article explains the process step by step and highlights the most common errors students make, so you can use it as a guide in class, in your office, or in your own writing workflow.
Why orientation changes cause confusion
In Microsoft Word, page orientation is usually applied to the document section you are currently working on. That is why many students become confused when they click Landscape and suddenly the whole document changes. The program is doing exactly what it is designed to do: it applies the setting to the current section unless the document has been divided properly. Section breaks allow one part of the document to behave independently from the rest, which is why they are essential for mixed-orientation documents.
This becomes especially important in school papers, laboratory reports, project documentation, and research manuscripts. A student may need to place a wide table in landscape, but keep the introduction, conclusion, or most of the body text in portrait. Without section breaks, the formatting becomes messy and the final output may look unprofessional. Once the student learns the section-break method, however, the task becomes predictable and much easier to manage.
The basic rule students should remember
The simplest rule is this: orientation changes require section breaks. If you remember nothing else, remember that line. A page break is not the same as a section break, and using only a page break will not solve the problem of changing portrait to landscape for just one page. Word formatting guides make this distinction very clear: section breaks separate formatting zones, while page breaks only move content to the next page.
Think of it this way: a section break tells Word, “from here onward, this part can have different settings.” That is why it works for headers, footers, page numbering, columns, margins, and page orientation. If you want one landscape page in the middle of a portrait document, you need to isolate that page into its own section first.
The Core Structural Rule
Always remember that orientation follows sections. A standard page break forces your text to a new sheet but leaves the layout rules completely bound together. A section break severs that link, granting you a brand new canvas with independent layout properties.
Step-by-step procedure
-
Open your Word document
Start by opening the document where you want to change page orientation. Make sure the file is already saved, especially if you are working on a long report. It is easier to make formatting changes when you are working on a stable copy of the file rather than a temporary draft. -
Place the cursor at the correct location
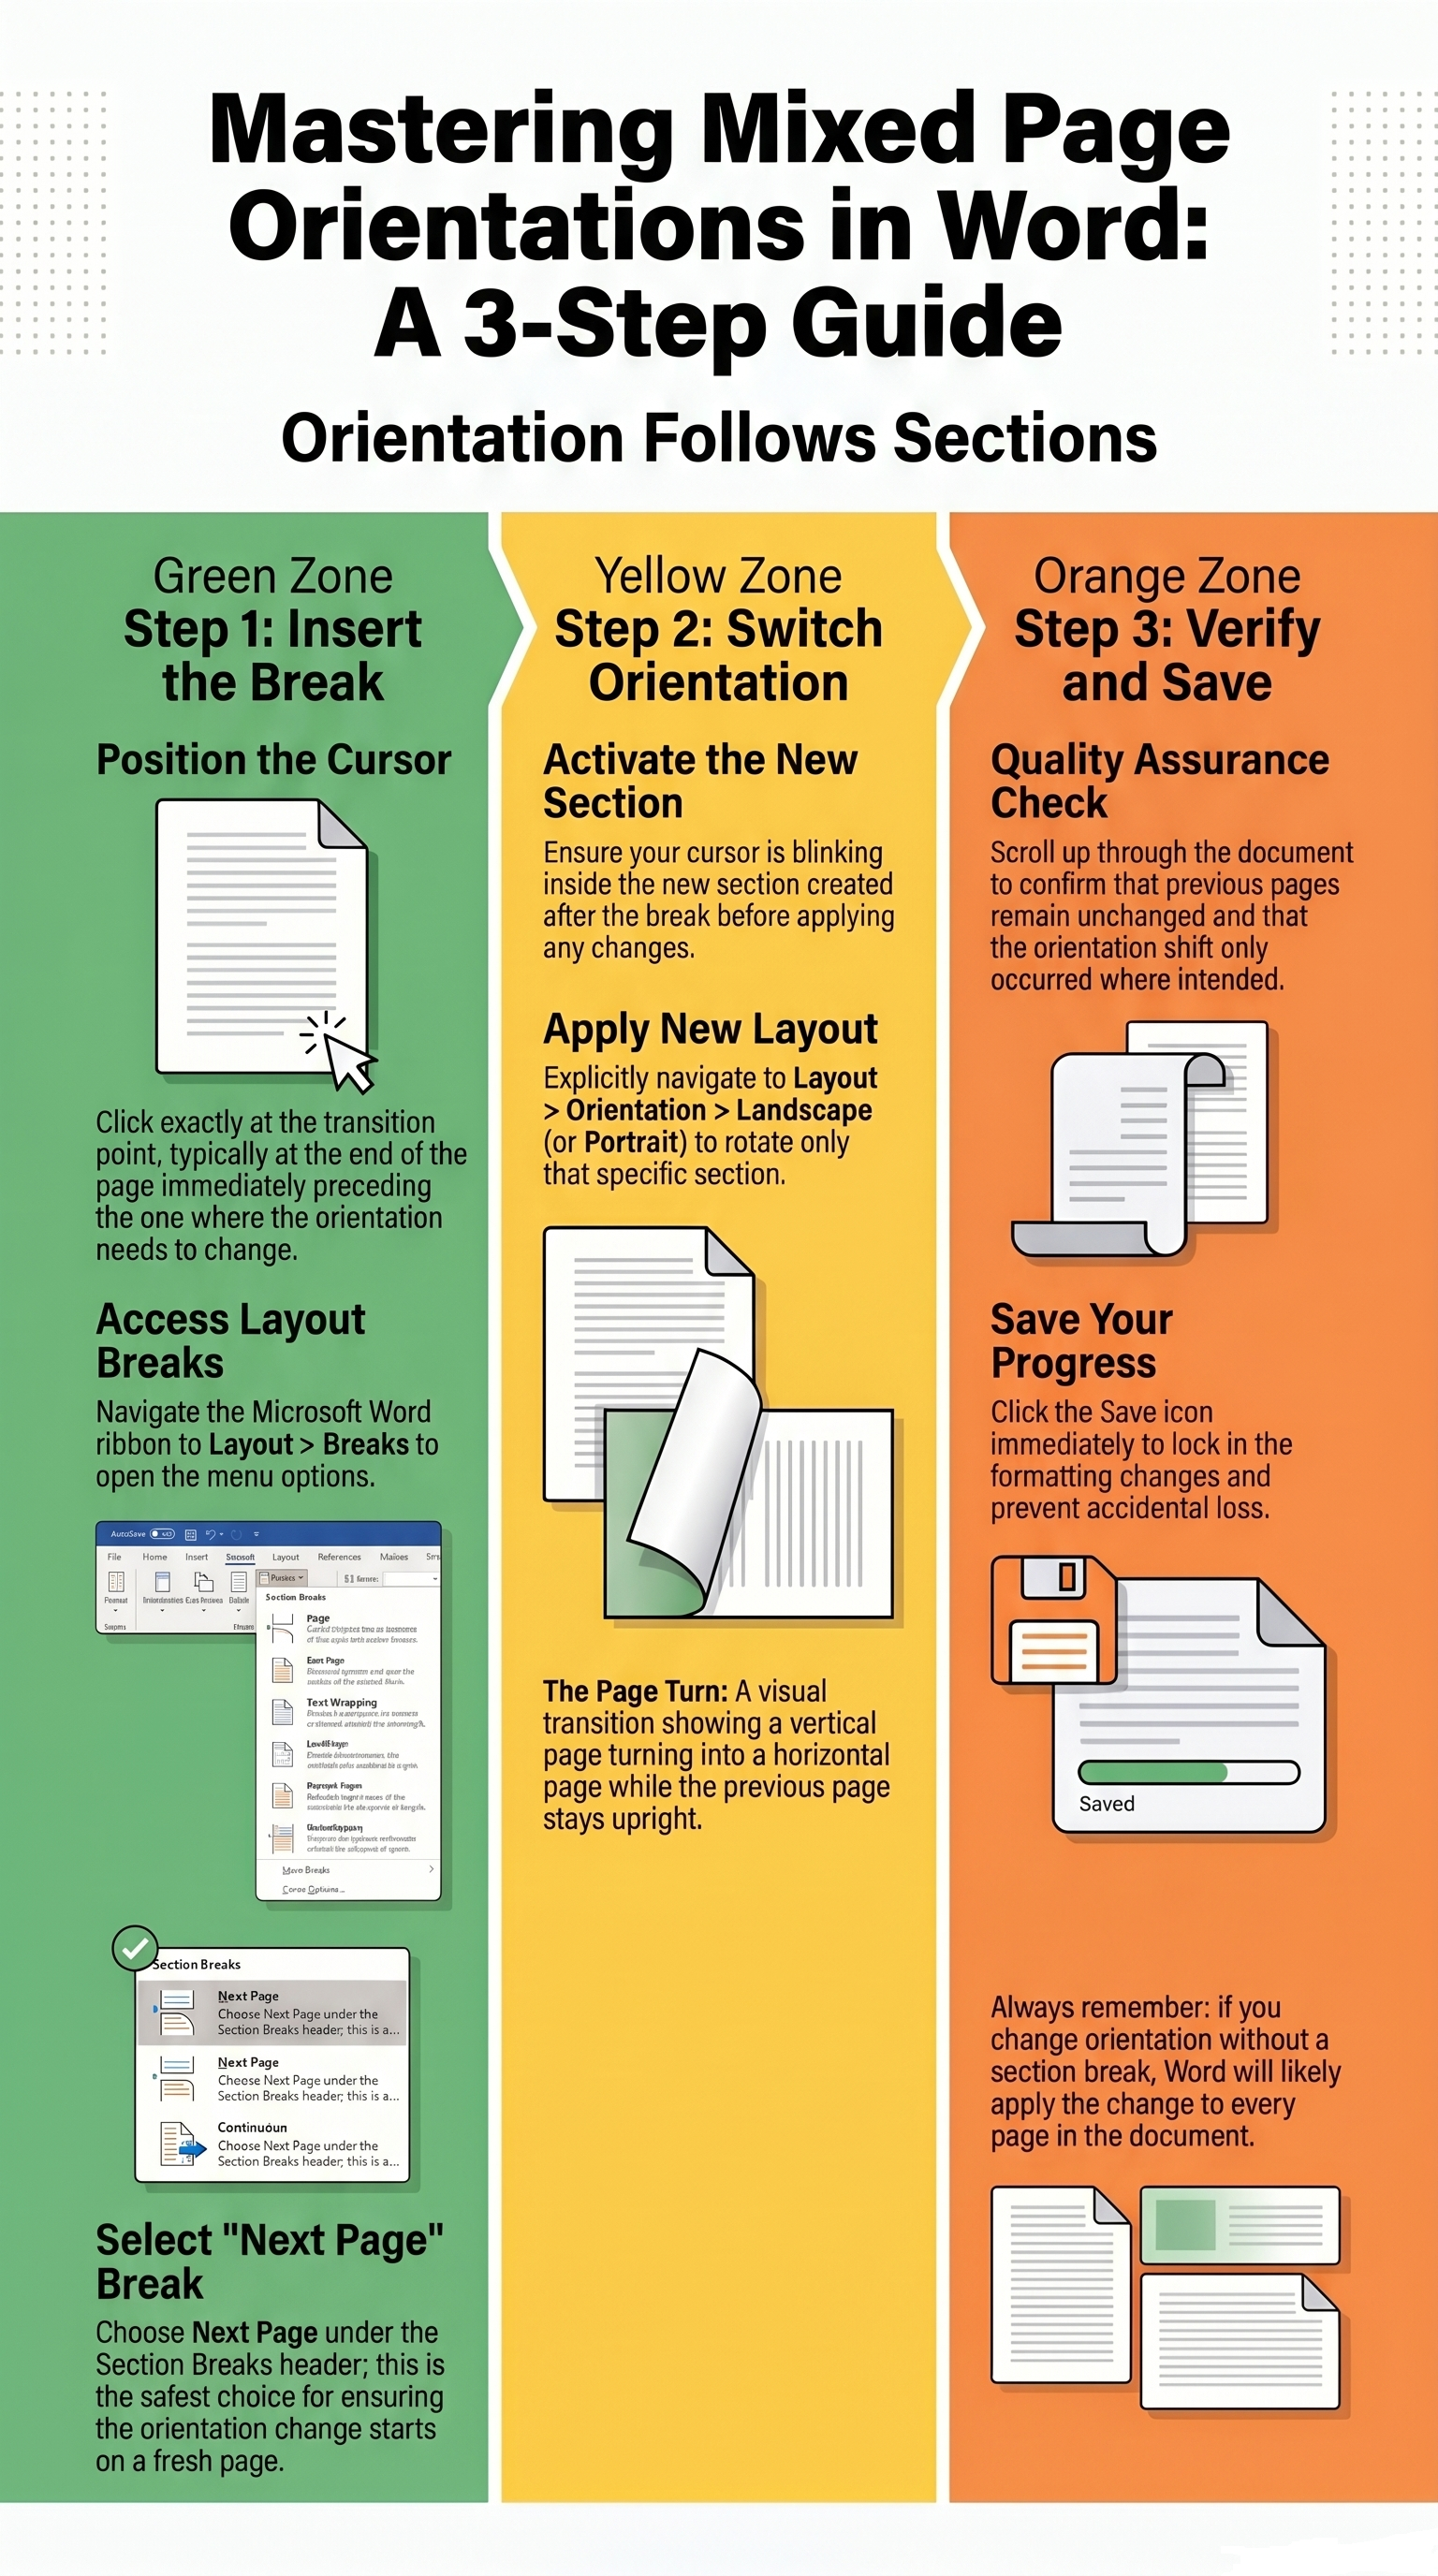
Click at the exact point where the orientation change should begin. Usually, this is at the end of the page before the landscape page starts. If you want page 2 to become landscape, place the cursor at the end of page 1. If you want page 3 to become landscape, place the cursor at the end of page 2. This placement matters because the section break will be inserted right where the cursor is positioned. -
Open the Layout tab
Go to the Layout tab in Microsoft Word. Some older versions may label this as Page Layout, but the function is the same. This is where Word places the tools for margins, page setup, orientation, columns, and breaks. -
Click Breaks
Look for the Breaks menu. Do not choose a simple page break if your goal is to change orientation for only part of the document. Word help resources and formatting guides specifically identify section breaks as the correct tool for different page orientations. -
Insert a section break
Choose Section Break: Next Page. This is the safest option for most student documents because it starts a new section on the next page. If you are trying to switch to a landscape page in the middle of a report, this is usually the right choice. A section break creates a separate formatting area so the new page can have different orientation settings without changing the pages before it. -
Move to the new section
After inserting the section break, your cursor should move to the next page or the next section. Click inside that new section if needed. This is the part of the document that you will now change to landscape or keep as portrait, depending on your requirement. -
Change the orientation
Return to the Layout tab and select Orientation. Choose Landscape if the page should be wide, or Portrait if you need to switch it back later. When the section break has been inserted properly, Word should apply the orientation only to that section instead of the whole document. This is the key step that students often miss. -
Continue typing or insert your content
Once the page orientation is changed, type your table, chart, or wide content on that page. If the next page needs to return to portrait, insert another section break after the landscape content and then switch the following section back to portrait. This allows a document to move from portrait to landscape and then back again without breaking the format of earlier pages. -
Check the final result
Scroll through the entire document and verify that only the intended page or section changed orientation. If an earlier page or later page also changed unexpectedly, that usually means the section break was not inserted in the correct place or the orientation was applied to the wrong section. Checking the document carefully before submission saves time and prevents grading issues caused by formatting mistakes. -
Save the document
Always save the file after making the changes. If possible, keep a backup copy before formatting large academic papers. This is especially useful if students are still learning Word and may need to repeat the process several times.
Common mistakes students make
One very common mistake is changing the orientation first and trying to fix the rest later. This usually causes the entire document to follow the new setting, which defeats the purpose of using mixed orientation. Another mistake is using only a page break instead of a section break. A page break moves content to a new page, but it does not create a new formatting section, so the orientation still stays linked to the whole document or current section.
Students also forget to place the cursor in the correct spot before inserting the break. If the cursor is placed too early or too late, the landscape page may appear in the wrong location. In addition, some users change the orientation back to portrait too soon or too late, causing the page sequence to look uneven. Careful cursor placement and correct sequencing are essential.
Why this skill matters in school work
Understanding orientation changes is more than just a technical Word skill. It helps students produce cleaner, more professional-looking academic documents. Reports often include tables, figures, charts, maps, and other visual elements that need extra horizontal space. If students know how to switch orientations properly, they can present information clearly without forcing wide content into an unreadable portrait page.
This is especially useful in research writing, project proposals, laboratory outputs, and instructional materials. A landscape page can make a huge table much easier to read, while the surrounding pages remain in the standard portrait format expected for formal documents. The ability to combine both orientations is one of those small formatting skills that makes a big difference in the final quality of student work.
The Golden Rule
Orientation properties track structural sections, not individual pages.
Do not alter layouts without applying section breaks first.
Quick classroom summary
If you are a research teacher who wants to explain the process to your students in one short sentence, you can tell students this: insert a section break first, then change the page orientation in the new section. That is the main idea behind all mixed-orientation Word documents. Once students learn that rule, they can confidently create portrait and landscape pages in the same file.